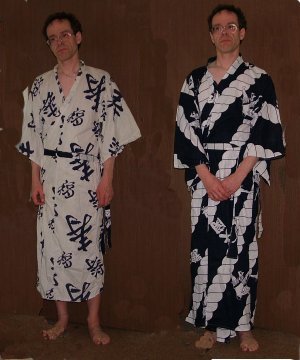
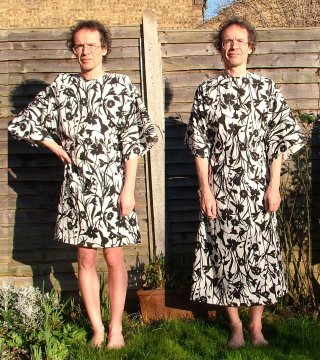
Two yukatas: left a cheap one from a catalogue, right a much better one bought in Japan.
This article was born out of an attempt to find something to wear about the house when it is not possible to dress naturally. The design requirements were: comfort, minimal restriction, quick to get on and off, reasonably covering. Convention would lead to something like shorts and T-shirt, but this is two separate garments and constricts the waist and groin. I've tried a kilt which is better but still sits on the waist. More suitable might be a one-piece garment suspended from the shoulders. I came quite close with a type of Japanese dressing gown called a yukata, which is a long, wrap-around cotton garment with mid-length loose sleeves secured with a belt or obi. The main problem with this is that it tends to come unwrapped over time and become rather open at the front. I modified one of mine with some extra Velcro fastenings, which works, but then it becomes quite fiddly to put on and secure.
Two yukatas: left a cheap one from a catalogue, right
a much better one bought in Japan.
Building on the design of the yukata and aiming to eliminate the negatives, one comes to a basically tubular garment, like a yukata permanently sewn up at the front. This then has to go on over the head, but it is then quite secure and needs no belt. I call this a tunic. It is similar in idea to the basic dress of the ancient Romans, and many other people, though then usually belted about the waist. Nevertheless, my wife calls it a dress. No matter, it is designed to a specification, not a social convention.
Such a tunic designed to the same basic dimensions as the yukata does in fact have a similar appearance. The big difference in wearing is that the continuous hem-line is more restrictive to walking, and especially climbing stairs, than the wrap-around design. However, a shorter version does not have this problem, and is my ideal solution so far. The shorter version is also quicker to get on; either comes off easily.
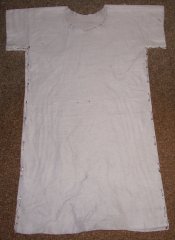
I have made several tunics while experimenting with ideal dimensions. What I didn't expect, being completely ignorant of dress-making, is how simple it is to make a basic loose-fitting tunic-like garment that is usable. Decorating recently, I made disposable tunics out of polyester dust sheet. You get several out of one sheet, use them until they get filthy (you can just wipe your hands on them), and then cut them up to use as rags before throwing them away. They take about ten minutes to make, including cutting out and making up with safety pins.
Which brings us to the point. It's so simple, so give it a try and see what you think. Here are the instructions for the simplest one.
The basic tunic is symmetrical, back-to-front and left-to-right, so it can be cut out of one sheet folded in four. It needs a sheet of material with one side twice the length of the garment and the other side equal to the maximum width. I'm going to show it first with dimensions for me (a skinny bloke), then indicate how to tweak for other sizes. In this case the tunic is going to be 1 metre [39 inches] long and 700mm [27.5 in] in width across the sleeves. Thus I start with a sheet 2 metres by 700mm. This conveniently can be got from a dust sheet, a bed sheet or a large tablecloth.
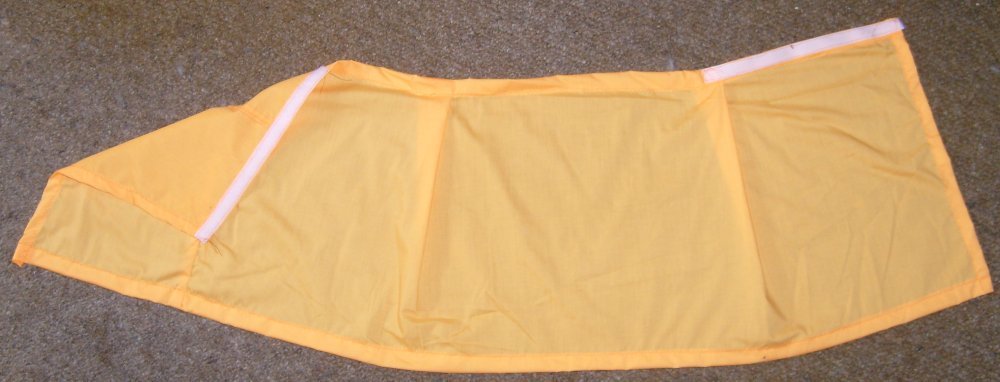
The left side of the diagram shows the single sheet of material that we start from. Fold twice as shown by the dotted lines to get a rectangle 1000 by 350mm as in the right side of the diagram. The letters show how the folds end up, so A is the corner with no loose edges and D is the corner with all loose edges. Mark out the lines shown and cut along them. Unfold around the vertical edge in the diagram, so that it looks basically T shaped, like this:
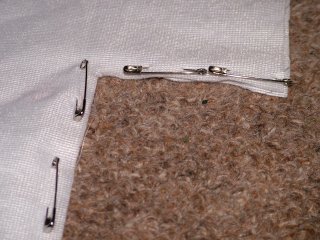
Join the two layers together along the straight cut edges, under the sleeves and down the sides. For trial, do this with safety pins or maybe even staples.
Then turn it inside out and try it on. Of course, to make something that will last and look respectable, it would be necessary to sew it up, allowing extra material at the bottom and sleeve ends to make a proper hem, and also for the side seams. The neck hole also would require some fiddly attention to turn over the edge of the material and prevent fraying. It can all be done from the single sheet, it just takes a bit longer.
Although this simple design works, it has problems. Perhaps the most obvious is that the neck hole is not centred on the neck, which tends to come out forwards, not straight up. To cure this we need to abandon the 4-fold cutting technique and bring the neck hole towards the front, typically by about 30mm [1.25 in] (I cheated, this is already done in the photo above). Depending on your shape, the front and back may not hang level; it's probably acceptable for skinnies, if not a more unsymmetrical cut will be required which will need to be done unfolded.
To make one for yourself, you will need to change the size to suit. The main concerns are:
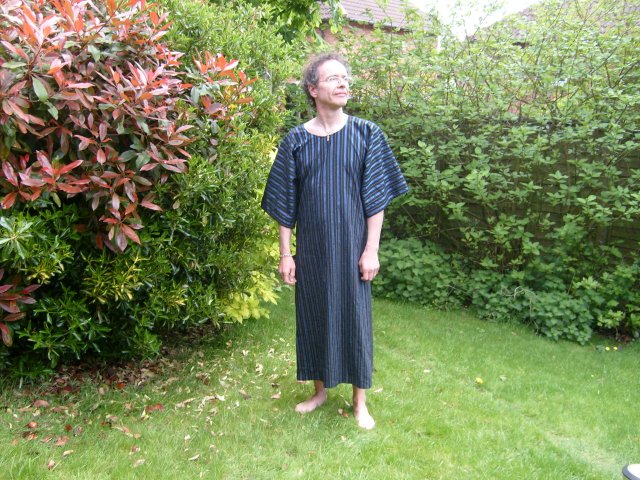
These are actually the first ones I did. These are fully sewn and finished (by my wife with a sewing machine). They are made of four pieces. This has a number of advantages: it's easier to align the design with any pattern on the fabric; the neck line can be modified for sloping or raised shoulders; it's much more economical on fabric when the sleeves are wider than the base. It's also easier to incorporate a zip fastener along the shoulder seam, which allows the neck hole to be smaller which to me looks a lot better.
This is the Mark 1 (about minimum safe length) and the
Mark 2
The shorter models, such as the Mark 1, can be got on over the head in much the same way as a pullover or T-shirt. The longer ones such as the Mark 2 are more difficult, and work better with the "arms right up into arm holes then drop over the head" technique. Even quicker is to have a full-length front closure, and I have tried both Velcro and zip fastenings on short versions. The zip is quicker, but it may take some effort to find a long-enough open-ended zip. Velcro is cheaper but fiddly to use as the sides are not self-aligning, especially lower down by the hem.
A front-opening long tunic would be useful, but it would be impractical to run the fastening right down to the hem, so it would have to hang open at the bottom. This is the next one to try. I'm not sure how it will work without overlap in the unfastened region of the skirt. It's likely to be more complicated than the designs so far.
It is possible to wear the long tunics with a belt to achieve variable length, for example short for working in the house and long when greater safety is needed. Just belt around the waist, pull the tunic up through the belt until the hem is at the required level, then let the excess above the belt fall down over the outside of the belt, hiding it. This will then look just like a Roman. However it negates the main purpose of the garment which is to not have any constriction on the body.
The most functional, best looking and easiest to use is the Mark 1. This suffers mostly from complexity in assembly, being in 4 pieces and having a lot more sewing.
The longer ones have an advantage only in perhaps looking a little less odd, but are harder to get on and awkward to move around in.
The single-piece cut-while-folded designs are the easiest to make, but suffer from poor use of material and a larger neck hole.
Single-piece designs with front closure can have a smaller neck hole but are not quicker to get on than the Mark 1. The closure also makes the tunic more intrusive, either cold and heavy with the zip or liable to rub with Velcro.
The designs with wide sleeves look less girlie but the sleeves can catch on door handles. Either sleeve is suitable for housework.
©2007 nib -
2007-02-20 -> 2009-07-11
Home
Contact